February 23, 2011

EtsyBaby Baby Shower & old time rag doll :)

Hi Everyone!!!

Last night I finished up the last bits of the gift set I will soon be sending off to a mother-to-be!

It will be sent because of a "baby shower" EtsyBaby is hosting...  HOW FUN!
The mother-to-be was able to go into my shop and pick an item that she wanted me to create for her, she fell in love with the black and white Damask Onesie Gift set with the matching shoes, bow and burp rag.

Here are the photos of the creation!


Also last night, I took some of the scraps I had around, and me and Queen made a rag doll for her... this is how the rag doll came out! (Note, her apron)


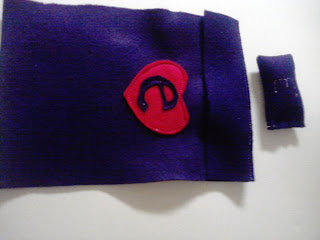
 Queen named her "Elizabeth"... and we had to make her a pillow monogrammed with an E, and a blanket! lol...


I will be posting a Tutorial on creating these dolls soon!

I hope you all have a wonderful day!
Happy Creating!

~Angel~

February 22, 2011

Crayon & Notepad Felt Roll!

Yesterday while browsing some blogs, I came across a tutorial for these adorable crayon and notepad rolls….
I made the first exactly like the tutorial for Tinkerbell, but the second, I put half a star instead of flower for Queen… (her favorite bedtime song is twinkle twinkle little star, and it’s one of the few things I figured I could free hand :))

This is the Twinkle Star roll open...

This is the Twinkle Star closed ...


These were so very easy, and came out super cute!  Best of all, I get to use up my stash of felt that I have been wondering what in the world I was going to do with…
The next time I have a few minutes of free time, I will making up a few of these to keep on hand for last minute birthday gifts, new big brother/sister gifts.. etc.

You can find the tutorial by clicking on the button below:


The only thing I could have kicked myself for, was not having pinking shears… I cut zig zags into the first roll by hand with a pair of regular scissors… I decided to forgo that part for the star roll… just me being lazy time savvy.
Hope these give you some inspiration! 

Here is the inside of the flower roll...

Here is the outside of the flower roll...


Now, go run around and gather all your felt scraps… and make some crayon/notepad rolls!

Oh, I have also been working on making an adorable black and white Damask gift set that I will be sending to a mom-to-be I am gifting for an EtsyBaby babyshower!  I will post pictures tomorrow :)
Happy Creating!


~Angel~

February 21, 2011

Sick lil ones! :(

Well, although this weekend was a pretty productive one, we have been nursing sick lil ones :(.

Knucklehead and the Queen have both been feeling bad the last few days... hopefully this will not last long!

I made these cute doggy bandannas over the weekend... the doggies collars just slide through (like a curtain rod) and they have a bandanna!  CUTE CUTE!

This one made for a beautiful female puppy!


This one made for a cute male dog!


I also completed the following pillows... one Mr & Mrs Orozco... and the other a HUGE overstuffed pillow made with signable fabric for a special boys Bar Mitzvah!


Sign-able pillow!


I hope you all have a wonderful day!

Happy creating!

~Angel~


February 14, 2011

HAPPY VALENTINES DAY!!!

 Happy Love Day everyone!

I hope you are able to spend some time with those that you love today...  as promised, here is the painting we created over the weekend... our old painting was not able to Evolve, due to my husband strapping himself to it under protest!
He said that we could do a new painting, but that he was not allowing us to paint over the current painting.. :(

Here is how it turned out!

***(Please NOTE*** These are NOT my house floors lol.... this is our breezeway, where we pulled up the ugly 50's tile and never did anything else with it.. so there's just old, no longer sticky, tile glue left on the cement floor.  This is why I allow them to paint down there... any splashes will be a welcome improvement to what it is now :)***

This is Tinker Bell having her turn first...


This is how it looked when she was finished.


This is Queen having her turn next...


This is how it looked once she was finished.


Here is Diva putting her touches on it...


I forgot to take a picture after she was finished, and then we had many other people take turns at it... Uncle Josh, Uncle Micah, Aunt Britney, Cousin Kaleb, a neighbor... and of course MYSELF!

After it was all said and done... This was the finished project!


 Here it is after I hung it between the wall sconces (however you spell it :)


 This photo came out a little blurry... but it goes nice... now if I could only find a frame to fit it... put that final touch!


I also completed a good bit of my current orders from Etsy... here are some of the finished products from those custom orders ...


Happy Creating Everyone!
~Angel~

February 8, 2011

The "ALWAYS EVOLVING PAINTING"

Okay, so here is the story about the painting above my kitchen table… I said that I would post about it later on, and I guess now is as good a time as any!
I had been looking for a larger painting to go in my kitchen over the table.  I have a large wall there, just sitting like a blank slate! 
My husband loves the color white, to me.. white is too sterile, I love color (guess it’s the creativeness in me.) So when my husband and I bought our house a few years ago we made a deal, I could paint LIGHT colors in the rest of the rooms in the house as long as I would agree to let the kitchen have white walls… so I took that deal.
I painted the living room a light sage green, our bedroom a light golden yellow, the bathroom a light airy blue color, and the girls room a light purple pink. (I know.. WOW right. :)  But it is the first time he agreed to any color at all and I didn't want to overwhelm him.)
So.. back to the kitchen wall, now it’s just a big white empty space above the table where we eat at, and it was just calling out to be adorned with SOMETHING!... I searched all over for a painting or mirror of some kind that would go there perfectly. Everything I found that I loved way just way out of my price range, and everything that I found IN my price range was not what I wanted. So there the wall was… just empty… day after day as I searched…
 UNTIL…
One day I picked up a book, and started to read in it… the book was titled The dwelling place… or something like that. I do not really remember. It was a lovely short read about how the home is a safe place to land at the end of the day, etc… it had little stories by readers who had wrote in and shared examples of how they made their house homey for their families, and told about traditions and such.
One lady wrote about her “Always Evolving Painting” and I absolutely LOVED the idea!!!
This is how it works… I took a large cheap canvas painting, unframed it, and painted white over the entire thing to start with a blank slate.  I then took out every color paint we had in the house and set it out on the cement floor in our unfinished breezeway so that if any paint got on the floor it would not be a big deal.
I called each one of our children (and a friend of our son who was spending the night) into the breeze way and told them that they could each pick three colors to use, then one at a time, they took turns painting and drawing anything and everything they wanted on the canvas for a certain amount of time, layering color over color... using bags and forks to add in texture... after each child had their turn on the painting I had my turn, and added a few finishing touches.  We then waiting for the painting to dry, re-framed it, and hung it over the table.  We had a wonderful, one of a kind MASTERPIECE!!!

My Mother-in-law gave me the beautiful sconces and flame-less candles for Christmas last year, and I thought they were the perfect touch for the painting.
The wonderful thing about this “Always Evolving Painting” is that when you get tired of the way the painting looks… you just take it down, and take turns going at it again!  I am going to keep a little photo album of the painting each time we create a new one, so one day we can look back over the years and see the many different ways it has evolved.
You can manipulate, a little bit, what you want it to look like by limiting the colors you will use.  When we made our MASTERPIECE the first time, we used every color we had… but now that we have our new kitchen table, I think this weekend we will use only Maroons, Reds, Blacks, Creams, Light greens and whites.


Our current (and first) painting has been hanging for about 7 months now; we all think it’s time for a change! So this weekend I think it will “EVOLVE” :)  I will post our new painting after it is completed as well....

Happy Creating Everyone!!!
~Angel~

Wooo hooo, new kitchen table for FREE!

Wow.. I just had to share this!

My neighbors are moving to another state, and decided they didn't need their dinning room table set.  They came and asked if I would like it!  Ummmm, YEAH!!!  It is BEAUTIFUL! AND, just enough seats for everyone.  Now, my old kitchen table is my sewing table... I have a spot all my own! :)  Actually, it was my sewing table before this... I had already taken it over, now it's just not in the kitchen. Here is my new table!


There is a story to the painting on the wall above our table, i will write about it in another post ;)


LOVE LOVE LOVE IT!


Okay, so enough about the table and on to the latest finished orders!
Here are some personalized pillows I have recently finished... they are "grandparents pillows"
It was an order of 6, and each one had the actually outline of the grandchildrens hands on the back of the pillow in matching fabric.


Pappa (yes, I put Pappy... I corrected it) is a doctor and needed medical fabric..


Omi D loves pretty greens


Aunt Mimi loves the color purple!


Gramps works in construnction and loves to fix things, so we worked with a tool printed fabric for him.


For Nanna, we need something light and pretty, so we went with white, cream and pink!


And... last but NOT least... we have Aunt Rachael!
All we had to work one was "something pretty, but not floral"

You know… just like a little kid being told they can’t have something… because I was asked not to work with florals for her… I was drawn to nothing but!  I was so annoyed with myself! lol
I think this may actually be my favorite of the six :)


I also had another order for a Tie Onesie. 
Another black tie with red initial, this one was a “D” for a little one named Dominic!