March 25, 2011

Buttercup Purse Tutorial!!

I love to find free patterns online… I always have!  I mean, who doesn’t love free things right? Combine that with my love of creating and it’s double goodness!

I found this Tutorial – Pattern online a while back, HERE and about a month ago was able to squeeze in the time to make it.  It was my first ever purse, and I LOVE IT.  I want to make another one, but this time I will print the pattern larger as the purse is a bit small to use for every day. (Of course I did make it, and love it, so I downsized the items I carried and CRAMED the rest of the items into it. )

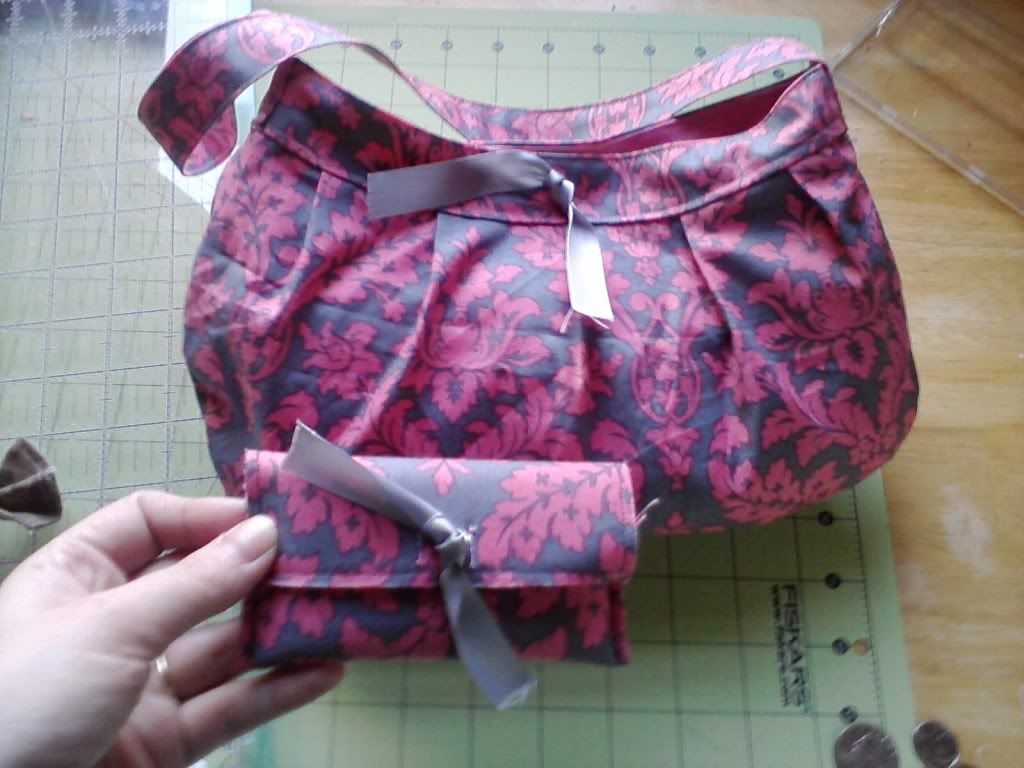
 I had actually made a business card case a couple of days before that, using the pink and grey damask fabric and some pink felt. When I decided to make the purse, I made it to match the card holder to create a set… and because I already had the fabric on hand.

It took me a lot longer to make than it should have.  I guess it took so long partly because I really didn’t want to rip anything so I was being careful, partly because I had a sick little one under my feet, and partly because I was delirious from being up waiting for hubby to get home from fishing in the wee hours… it was finished around 1:00 a.m..  Total time was probably around 3 hours for me that night… but I’m sure in better circumstances it could have been completed in about an hour. I had a request for a red one… and I picked up the fabric today to make it.


Me and my children also created some super easy, and super FUN throw pillows last night!!!  I will try and post a tutorial on that Monday!!! 


Here are the photos of the cute little purse and how it turned out!


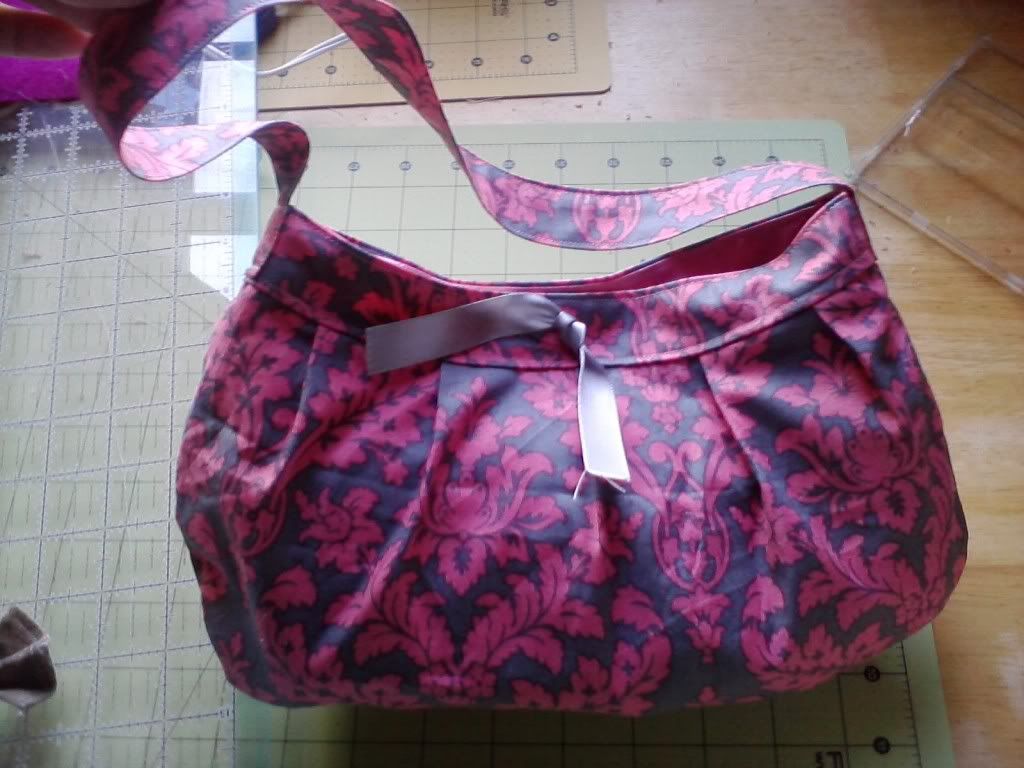
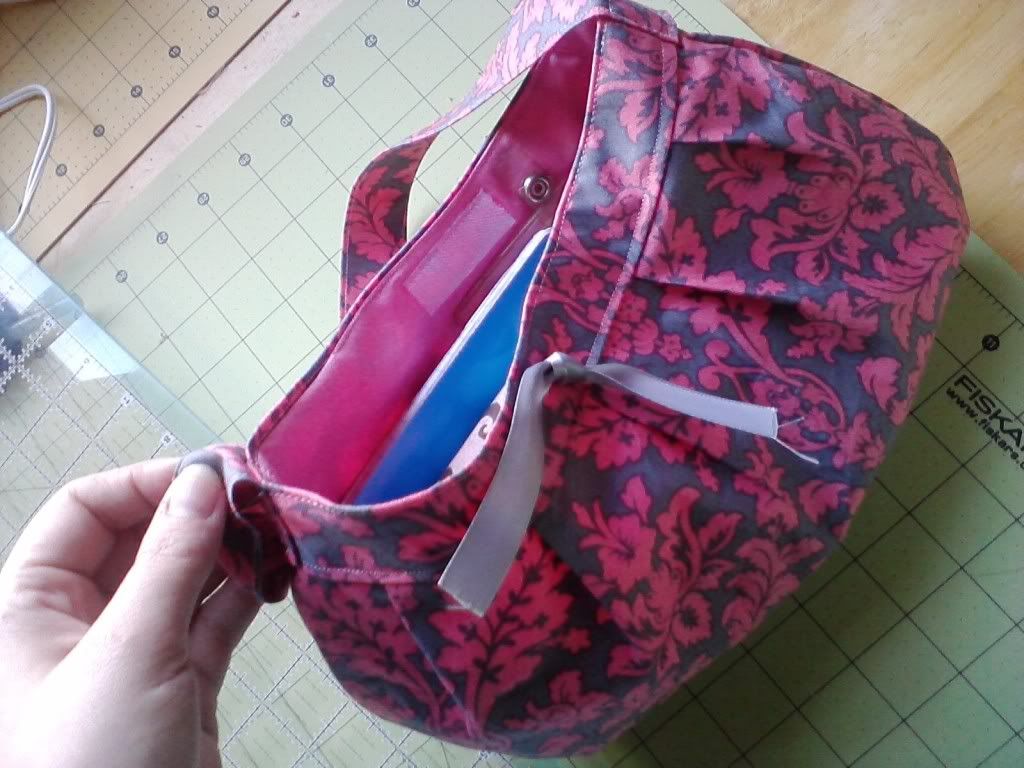
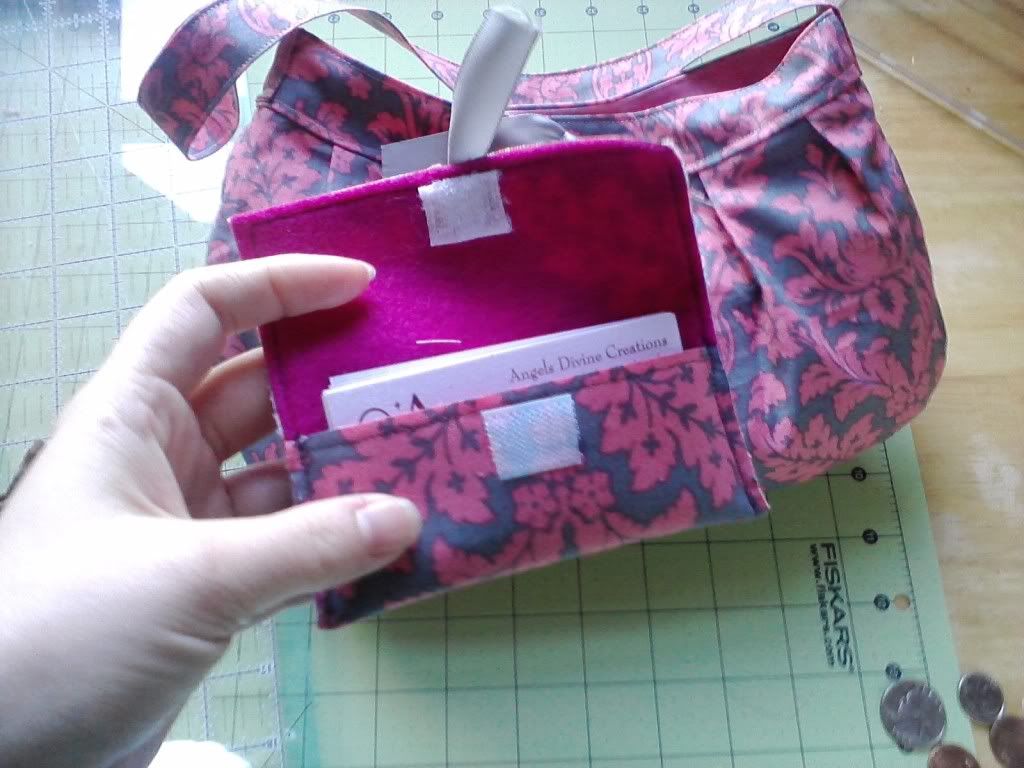
Also… I modified it a little teeny tiny bit.  I was being lazy again didn’t have a snap for closure, so I used Velcro instead.  I think I will try my hand at a snap next go round.  I also added a coordinating color ribbon for a simple accent instead of the oblong thingy the directions say to use.

March 24, 2011

How to alter your jeans for that PERFECT fit!!!

 I wanted to share this simple yet VERY effective way of doing your very own pants alterations (just discovered this myself.)  Comes in handy if you have children who receive hand me downs, you receive hand me downs yourself, or have recently lost weight (GO YOU!)

In my case, I found some pants for sale at $5.00 a pair, so I bought 4.  I am a young 27 year old… but after having four children, my body doesn’t cooperate as such :)  I would love to wear those cute, tight junior pants with their odd number sizes… but they sit so low on my now spread hips its ridiculous! So I humbly move on the misses even number sizes… this time to find that very sale!  Now, I am not a large woman.. let’s just say I weigh below 130 and am 5’3”.  Because my hips are wide I have two options… either buy pants that fit me well in my legs but are toooo tight in the hip/waist area, or buy pants that fit well in the hip/waist area but are super baggy in the butt/legs… which was the case this time around.

Now, when I tried the pants on at the store, they did seem a little baggy in the leg/backside area, but nothing I could not live with since they fit so well in my waist/hip area.  Little did I know that an hour into wearing these jeans, the fabric would almost swell and expand well past their original size.  Once washed and dried they would appear to shrink back only to expand again the next time they were worn. So my savings on these 4 $5.00 pair of jeans wound up being a wasted $20.00 because they were all used as back up jeans when nothing else was clean.

I came across a site yesterday, (click on the photo with the crazy girl) and thought.. hey!  I can do this.. it’s not like I can mess the jeans up to make me want to wear them any less than I already do right?!  So last night I tried it.  I gathered up all four of those jeans, turned them all inside out… created an assembly line if you will… and sewed away.  It took maybe 20 minutes to complete all four pairs.

Now for the drum roll………….. I tried them on and it was like the heavens opened up and the Angels began to sing… AAAAOoooohhhhhhhHHMMMmmmm!  They fit like a GLOVE!!! 

I now have visions of going to every sales wrack I see and buying up all the jeans no matter the size because I know I now have the power to alter then to MY FIT!

My poor poor children are now subject to even more hand me downs : )

Regrettably, I do not have before and after photos.. but the lovely young lady in the tutorial link provided above has! 


On a side note... I created this Awesome pillow and onesie for a wonderful little boy who is having his room re-decorated in Star Wars from Pottery Barn! 


Cute Tie Shirt for Regers lil brother!


Regers Star War Pillow Front

Regers Star War Pillow Side.


Regers Star War Pillow Back!

Thank You All for viewing!
Happy Creating!
~Angel~

March 22, 2011

Conversations with Tinker Bell!

I can not believe it has been so long since my last post.
I have been so busy getting orders out lately, I even forgot to snap photos of some!
I am working on another tutorial to hopefully have up pretty soon!
I wanted to share a couple of stories with you…

Place : In the living room of my home, on the sofa.
Who: Myself, Hubby & Tinkerbell
Me: (finishing up the conversation on my reaction when I found out I was pregnant with the Queen)…. “….and I cried, and cried”
Tinker bell: “Because you took a pill to get pregnant?”
Me: “No honey, you don’t take a pill TO get pregnant.”
Tinker bell: (blank expression) “How do you get pregnant then?”
Hubby: (wide eyed looking at me as if to say … how will you get out of this one.)
Me: (eyes just as wide as hubbys) “Ohhh, yeah… a pill… It’s a pill!”
Tinkerbell: (pleased expression)

Whew!

Another conversation with Tinker Bell
Place: Walking down the drive way after grabbing the mail.
Who: Myself and Tinkerbell
Tinkerbell: “Mommie, do you pass gas?”
Me: ( a lil shocked) “Everybody passes gas honey.”
Tinkerbell: “I never heard you pass gas”
Me: “That’s because I don’t pass gas in front of people.”
Tinkerbell: “Oh…. You only pass gas on the side of them?”

YOU CAN’T MAKE THIS STUFF UP!

On to the Creations!
Cute Onesie for a birthday girl! 


 Gift Set with letter "M"


Spa Party! White Spa Hair Wraps with Pink initials 


 Another happy customer!


 A Camo night gown I created for Tinkerbell!


Another gift set with the letter "S" 


March 8, 2011

Happy Mardi Gras!

Well, the kids have all been sick with one thing or another the past couple of weeks... I can not wait until we no longer have to worry about doctors appointments or giving everyone anti-biotic all through out the day!

There have been lots of little projects I have been working on. I hope to be able to post pictures tomorrow.  I am so sorry I have not had time to post, and this one is a short and sweet one....  Hopefully we can jump back on track next week!

For all you fellow Louisianians  HAPPY MARDI GRAS! 

& Happy Creating

~Angel~