April 19, 2011

Tinkerbells Birthday!


Seven years ago today, I held in my arms for the first time, my beautiful Tinkerbell!
She was my third born child, my second daughter, and a beautifully healthy baby.
We celebrated her birthday party at Chuck E Cheese this past Sunday afternoon… and she had a blast!

Here are some of the pictures we took on that day. The only thing she asked for today, was to make some gingerbread… (don’t ask, because I do not know… I didn’t ask myself) so that’s what we will make.
There is also a picture of myself and The Queen, taken in a booth there. The picture booth actually broke soon after this was taken (hopefully we did not break it ; )  so unfortunately we were unable to take pictures there with anyone else.
That’s all for today, thank you for stopping by, and happy creating! 
~Angel~


April 15, 2011

Blog Featured!

Hi Everyone.... my blog has been featured in another wonderful blog!  You can view it by clicking on the Fabulous Friday Freebies link bellow the banner!

You could win a free item from my shop by participating!


FRIDAY, APRIL 15, 2011


http://fabulousfridayfreebies.blogspot.com/
Kicking off another week of fun on Fabulous Friday Freebies. We've gotTWO treats in store for you today. Here's our FIRST...

Look at THAT little cutie pie! Isn't she a doll baby? We've got a special surprise for you this week....you get to PICK the giveaway!
is offering a lucky winner
An Item or Set of their choice.
That's right. You win. You shop. You select your favorite thing and its YOURS!

Browse these sweet baby sets with coordinating onesies, bows shoes and burp cloths. Win this giveaway and you can have the entire listing custom made for your own little one or to give away. Your gift to the delighted new mom will be the hit of the baby shower!!

Classic, stylish black and white damask is Angels Divine Creations signature specialty, but your options are limitless. Choose your color scheme and preferences and allow them to create something truly unique and special! We love the little ruffle adorned britches that coordinate with this pretty-in-pink set!

And these are a fun accent piece! Spruce up your kiddo's bedding with a personalized throw pillow. These cute, comfy cushions are a simple way to make a big statement. Tie the room together with a coordinating pillow all her own.

Angels Divine Creations is making their cute creations even more irresistible with a 15% discount offered to our readers this week only. Use coupon code FFF15 at checkout to redeem your special savings. And remember, you earn extra entries into the giveaway for purchases made!!

Here are the game rules. Check back Wednesday to see if you are our lucky winner and get to pick your prize!!!

For 1 entry:
Leave your name in a comment and tell us what you would select if you win this giveaway.

For 2 additional entries
Simply click "follow" on the right hand sidebar.
AND
Become a facebook fan HERE.
Leave 2 SEPARATE comments that you've done both.

For 2 additional entries:
On their etsy page, click "add to favorites" (bottom left hand sidebar).
and
become a Facebook fan of Fabulous Friday Freebies HERE.
Leave a 2 SEPARATE comments that you've done both.

For 3 additional entries:
Post about Angels Divine Creations great giveaway and link http://fabulousfridayfreebies.blogspot.com in your facebook status.
Leave 3 SEPARATE comments that you facebooked.

For unlimited entries:
Make a purchase from Angels Divine Creations. For every dollar you spend, you can leave 1 SEPARATE comment telling us what you bought. Dont forget your 15% discount to sweeten the deal!

April 12, 2011

Spray Paint Throw Pillows?!

As you all know.. I love to find free tutorials online... I happened across a tutorial for spray painted throw pillows using wax paper and it caught my attention... so I read on about the steps, etc.

On my way home that very day I stopped at the store and picked up wax paper and spray paint :)  I thought it would be a very neat project for the kids to do... they could all do anything they wanted, and have a pillow for their room that was completely customized by them, for them... PRETTY COOL!...

I just wasn't too sure how it would all turn out.

Here are the finished projects...

My son, is all boy!  Knuckle Heads room is done in a dark blue, and he is always catching some sort of critter... so for his pillow, we did a Gecko... I really like the way this one turned out.


My daughter had a friend sleeping over, so she made a pillow as well.  She wanted a "Cute Smiley Face" I can draw pretty well, but a "Cute Smiley Face"?!  So I said, well, how about we do the word Smile, with :) behind it.  She replied.. how about Capital X and Capital D... so that's what we did .... Smile XD in a cute font.


My oldest loves the cute skull and cross bones... as well as peace signs and hearts. She actually wanted a heart on both sides of her name, but when she began to spray the paint (a little too zealously) one of them flew away... so she was left with the one. I still think it came out pretty well.


Tinker Bell wanted the word LOVE... but she wanted a cute font.  I'm telling you, I must have gone through about 30 different fonts with her before she fell in love with this one.  Instead of choosing one paint color, she wanted to do both pink and purple. So we layered a pink stripe, then a purple, then a pink, then a purple.  It has an almost tie dye look to it.


You can see the tutorial yourself at V and Co. by clicking the button bellow.


Here are some other orders / projects I have been working on lately :)


Reversible Shoes!


Cutie Pie, Honey Bunch!


A happy Customer!


Thank you all... and happy creating!
~Angel~

March 25, 2011

Buttercup Purse Tutorial!!

I love to find free patterns online… I always have!  I mean, who doesn’t love free things right? Combine that with my love of creating and it’s double goodness!

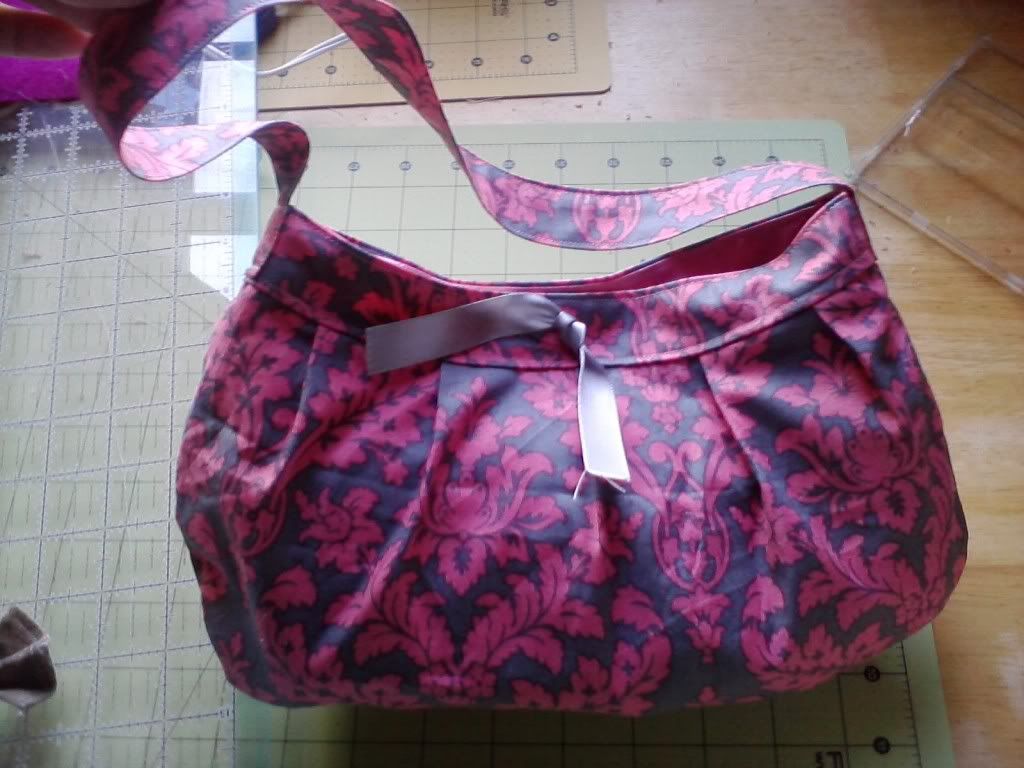
I found this Tutorial – Pattern online a while back, HERE and about a month ago was able to squeeze in the time to make it.  It was my first ever purse, and I LOVE IT.  I want to make another one, but this time I will print the pattern larger as the purse is a bit small to use for every day. (Of course I did make it, and love it, so I downsized the items I carried and CRAMED the rest of the items into it. )

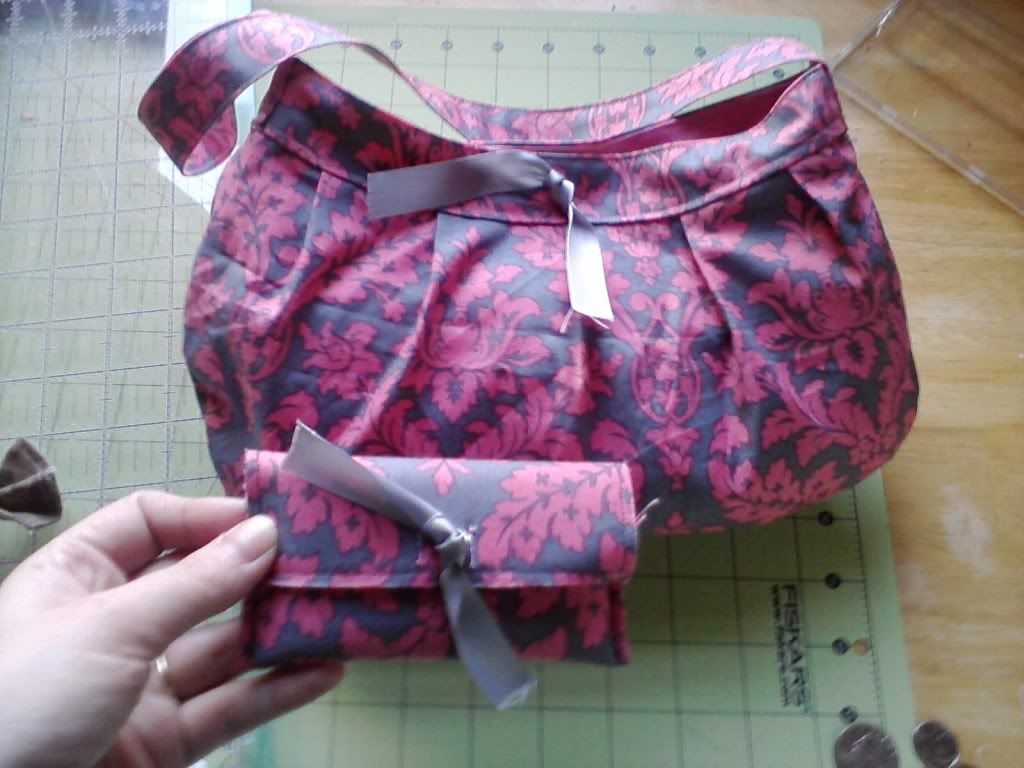
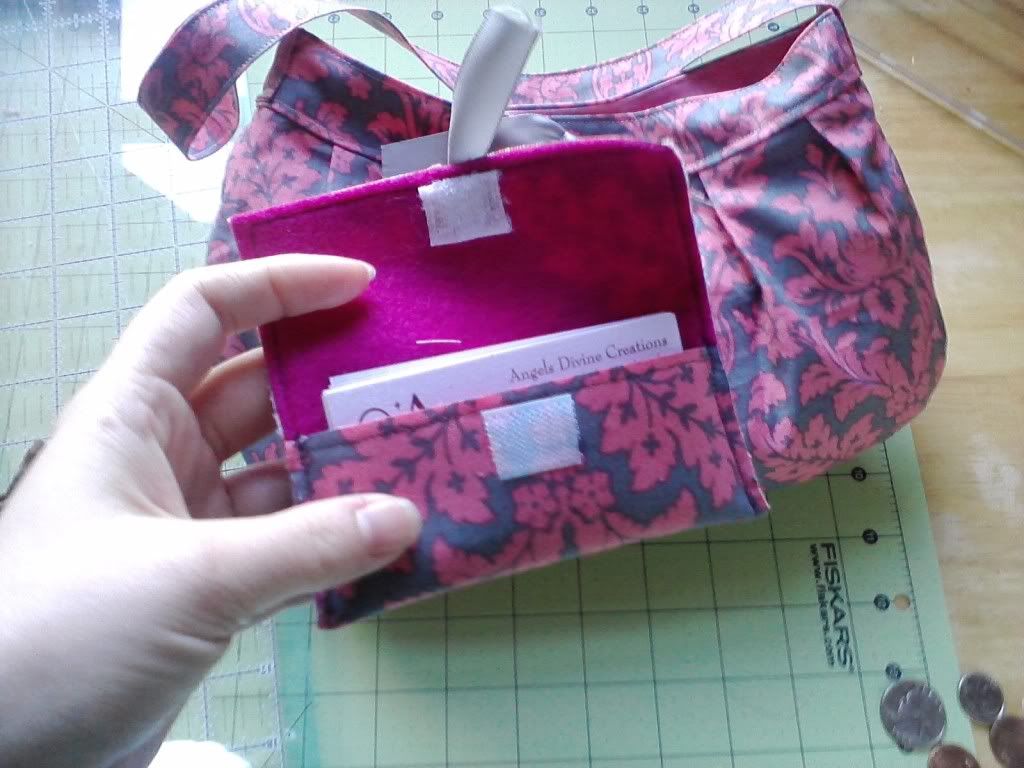
 I had actually made a business card case a couple of days before that, using the pink and grey damask fabric and some pink felt. When I decided to make the purse, I made it to match the card holder to create a set… and because I already had the fabric on hand.

It took me a lot longer to make than it should have.  I guess it took so long partly because I really didn’t want to rip anything so I was being careful, partly because I had a sick little one under my feet, and partly because I was delirious from being up waiting for hubby to get home from fishing in the wee hours… it was finished around 1:00 a.m..  Total time was probably around 3 hours for me that night… but I’m sure in better circumstances it could have been completed in about an hour. I had a request for a red one… and I picked up the fabric today to make it.


Me and my children also created some super easy, and super FUN throw pillows last night!!!  I will try and post a tutorial on that Monday!!! 


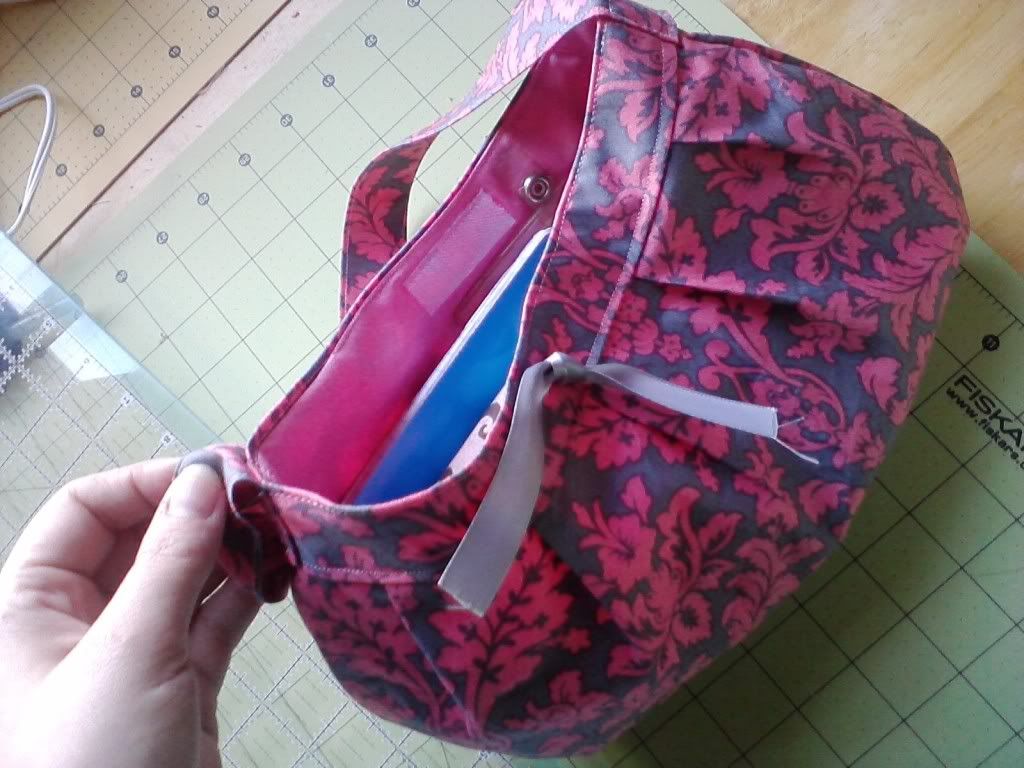
Here are the photos of the cute little purse and how it turned out!


Also… I modified it a little teeny tiny bit.  I was being lazy again didn’t have a snap for closure, so I used Velcro instead.  I think I will try my hand at a snap next go round.  I also added a coordinating color ribbon for a simple accent instead of the oblong thingy the directions say to use.

March 24, 2011

How to alter your jeans for that PERFECT fit!!!

 I wanted to share this simple yet VERY effective way of doing your very own pants alterations (just discovered this myself.)  Comes in handy if you have children who receive hand me downs, you receive hand me downs yourself, or have recently lost weight (GO YOU!)

In my case, I found some pants for sale at $5.00 a pair, so I bought 4.  I am a young 27 year old… but after having four children, my body doesn’t cooperate as such :)  I would love to wear those cute, tight junior pants with their odd number sizes… but they sit so low on my now spread hips its ridiculous! So I humbly move on the misses even number sizes… this time to find that very sale!  Now, I am not a large woman.. let’s just say I weigh below 130 and am 5’3”.  Because my hips are wide I have two options… either buy pants that fit me well in my legs but are toooo tight in the hip/waist area, or buy pants that fit well in the hip/waist area but are super baggy in the butt/legs… which was the case this time around.

Now, when I tried the pants on at the store, they did seem a little baggy in the leg/backside area, but nothing I could not live with since they fit so well in my waist/hip area.  Little did I know that an hour into wearing these jeans, the fabric would almost swell and expand well past their original size.  Once washed and dried they would appear to shrink back only to expand again the next time they were worn. So my savings on these 4 $5.00 pair of jeans wound up being a wasted $20.00 because they were all used as back up jeans when nothing else was clean.

I came across a site yesterday, (click on the photo with the crazy girl) and thought.. hey!  I can do this.. it’s not like I can mess the jeans up to make me want to wear them any less than I already do right?!  So last night I tried it.  I gathered up all four of those jeans, turned them all inside out… created an assembly line if you will… and sewed away.  It took maybe 20 minutes to complete all four pairs.

Now for the drum roll………….. I tried them on and it was like the heavens opened up and the Angels began to sing… AAAAOoooohhhhhhhHHMMMmmmm!  They fit like a GLOVE!!! 

I now have visions of going to every sales wrack I see and buying up all the jeans no matter the size because I know I now have the power to alter then to MY FIT!

My poor poor children are now subject to even more hand me downs : )

Regrettably, I do not have before and after photos.. but the lovely young lady in the tutorial link provided above has! 


On a side note... I created this Awesome pillow and onesie for a wonderful little boy who is having his room re-decorated in Star Wars from Pottery Barn! 


Cute Tie Shirt for Regers lil brother!


Regers Star War Pillow Front

Regers Star War Pillow Side.


Regers Star War Pillow Back!

Thank You All for viewing!
Happy Creating!
~Angel~